
Part11 百炼大模型集成到项目中
Part11 百炼大模型集成到项目中
1. 智能体集成到项目中
1.0 Spring AI 是什么
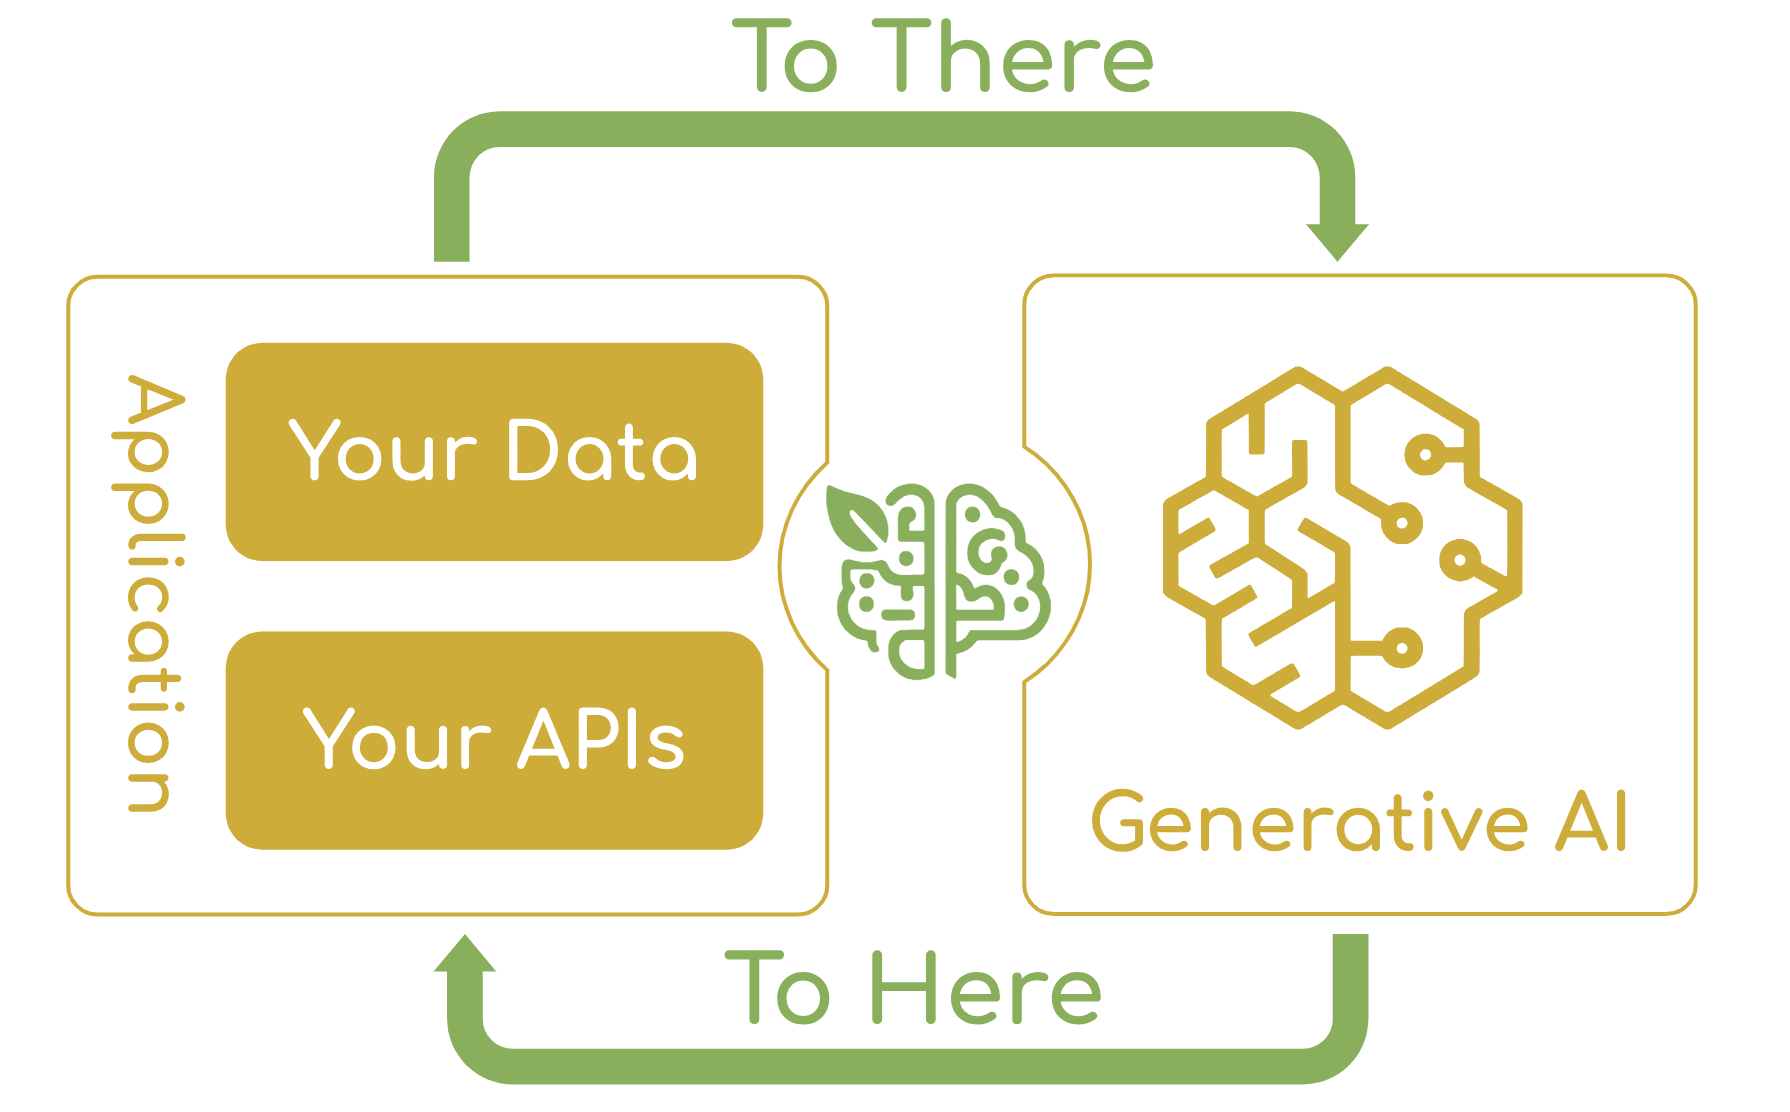
官方地址 :https://spring.io/projects/spring-ai
Spring AI 可以理解为:
用 Spring Boot 的开发方式去接入大模型,并把提示词、对话、工具调用、RAG、结构化输出等能力封装成更适合 Java 后端开发的 API。
如果不用 Spring AI,我们通常要手写很多内容:
- 自己拼接 HTTP 请求去调用模型接口。
- 自己维护消息上下文。
- 自己定义工具调用协议。
- 自己处理模型调用前后的对象转换。
用了 Spring AI 后:
- 通过 Starter 引入模型能力。
- 用
ChatClient发起对话。 - 用
@Tool把 Java 方法暴露给模型。 - 用 Spring Bean、配置文件、Service、Controller 的方式组织 AI 功能。
这就非常适合我们这种已有 Spring Boot 项目,要把 AI 能力嵌入业务系统的场景。
1.1. 准备SpringAI环境
准备SpringAI环境
今天,我们将使用SpringAI对中州养老项目进行升级,为每一位用户打造一个专属的智能管家。
1. 导入Springai依赖 我们需要在项目中导入alibabaai的依赖和一些配置信息,如下: 导入阴影部分的代码
<?xml version="1.0" encoding="UTF-8"?>
<project xmlns="http://maven.apache.org/POM/4.0.0"
         xmlns:xsi="http://www.w3.org/2001/XMLSchema-instance"
         xsi:schemaLocation="http://maven.apache.org/POM/4.0.0 http://maven.apache.org/xsd/maven-4.0.0.xsd">
    <modelVersion>4.0.0</modelVersion>
    <parent>
        <groupId>org.springframework.boot</groupId>
        <artifactId>spring-boot-starter-parent</artifactId>
        <version>3.5.0</version>
        <relativePath/>
    </parent>

    <groupId>cn.yangeit</groupId>
    <artifactId>zzylai</artifactId>
    <version>1.0-SNAPSHOT</version>

    <properties>
        <maven.compiler.source>17</maven.compiler.source>
        <maven.compiler.target>17</maven.compiler.target>
        <project.build.sourceEncoding>UTF-8</project.build.sourceEncoding>
    </properties>
    <dependencies>
<!-- web相关依赖       -->
        <dependency>
            <groupId>org.springframework.boot</groupId>
            <artifactId>spring-boot-starter-web</artifactId>
        </dependency>
<!--测试相关依赖-->
        <dependency>
            <groupId>org.springframework.boot</groupId>
            <artifactId>spring-boot-starter-test</artifactId>
            <scope>test</scope>
        </dependency>
<!--  数据库驱动      -->
        <dependency>
            <groupId>mysql</groupId>
            <artifactId>mysql-connector-java</artifactId>
            <version>8.0.21</version>
        </dependency>
        <!-- mybatis plus -->
        <dependency>
            <groupId>com.baomidou</groupId>
            <artifactId>mybatis-plus-boot-starter</artifactId>
            <version>3.5.5</version>
        </dependency>
<!--  mybatisSpring依赖      -->
        <dependency>
            <groupId>org.mybatis</groupId>
            <artifactId>mybatis-spring</artifactId>
            <version>3.0.3</version>
        </dependency>
<!--  小辣椒依赖      -->
        <dependency>
            <groupId>org.projectlombok</groupId>
            <artifactId>lombok</artifactId>
            <version>1.18.28</version>
        </dependency>
<!--    糊涂工具包    -->
        <dependency>
            <groupId>cn.hutool</groupId>
            <artifactId>hutool-all</artifactId>
            <version>5.8.13</version>
        </dependency>

        <!-- Token生成与解析-->
        <!-- JWT依赖-->
        <dependency>
            <groupId>io.jsonwebtoken</groupId>
            <artifactId>jjwt-api</artifactId>
            <version>0.11.5</version>
        </dependency>
        <dependency>
            <groupId>io.jsonwebtoken</groupId>
            <artifactId>jjwt-impl</artifactId>
            <version>0.11.5</version>
            <scope>runtime</scope>
        </dependency>
        <dependency>
            <groupId>io.jsonwebtoken</groupId>
            <artifactId>jjwt-jackson</artifactId>
            <version>0.11.5</version>
            <scope>runtime</scope>
        </dependency>

        <dependency>
            <groupId>org.springdoc</groupId>
            <artifactId>springdoc-openapi-starter-webmvc-ui</artifactId>
            <version>2.5.0</version>
        </dependency>
        <dependency>
            <groupId>org.springdoc</groupId>
            <artifactId>springdoc-openapi-starter-webmvc-api</artifactId>
            <version>2.5.0</version>
        </dependency>

        <!--阿里AI-->
        <dependency>
            <groupId>com.alibaba.cloud.ai</groupId>
            <artifactId>spring-ai-alibaba-starter</artifactId>
            <version>1.0.0-M2.1</version>
        </dependency>

    </dependencies>

    <!--spring-ai 依赖管理-->
    <dependencyManagement>
        <dependencies>
            <dependency>
                <groupId>org.springframework.ai</groupId>
                <artifactId>spring-ai-bom</artifactId>
                <version>1.0.0-M2</version>
                <type>pom</type>
                <scope>import</scope>
            </dependency>
        </dependencies>
    </dependencyManagement>
<!--仓库-->
    <repositories>
        <repository>
            <id>spring-milestones</id>
            <name>Spring Milestones</name>
            <url>https://repo.spring.io/milestone</url>
            <snapshots>
                <enabled>false</enabled>
            </snapshots>
        </repository>
        <repository>
            <id>spring-snapshots</id>
            <name>Spring Snapshots</name>
            <url>https://repo.spring.io/snapshot</url>
            <releases>
                <enabled>false</enabled>
            </releases>
        </repository>
    </repositories>


    <build>
        <plugins>
            <plugin>
                <groupId>org.springframework.boot</groupId>
                <artifactId>spring-boot-maven-plugin</artifactId>
                <version>3.5.0</version>
            </plugin>
        </plugins>
    </build>
</project>
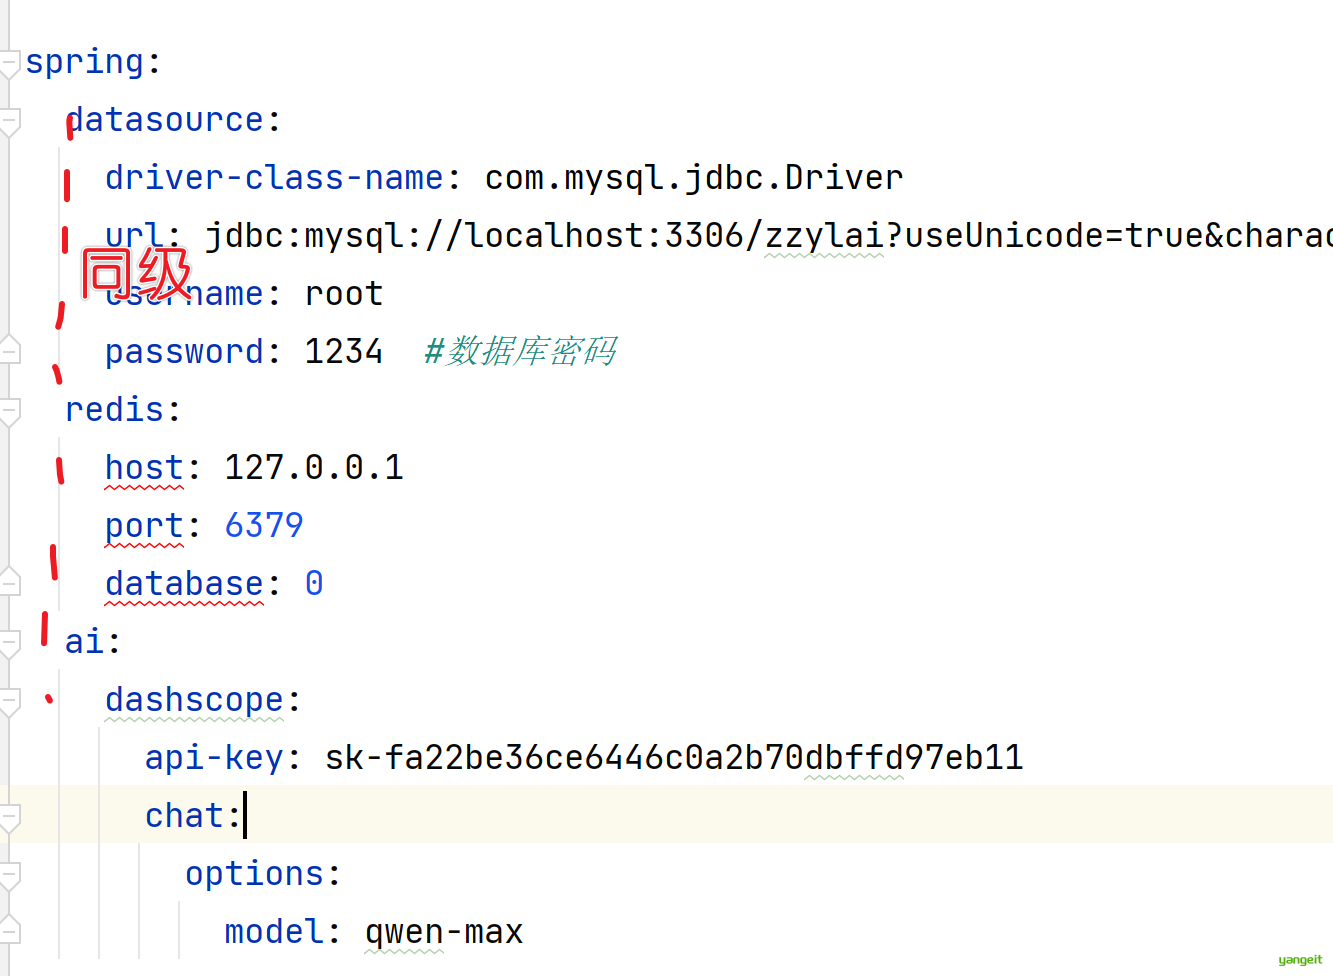
2. 在配置文件中application.yml中,配置百炼大模型的key和模型名字
spring:
  ai:
    dashscope:
      api-key: sk-fa22be36ce6446c0a2b70dbffd97eb11
      chat:
        options:
          model: qwen-max
3. 在config包中,创建ai配置文件ReservTools.java.在这个文件中,书写供AI调用的Function
@Configuration
public class ReservTools {
    @Autowired
    ReservationMapper reservationMapper;

    @Autowired
    FamilyMemberElderMapper familyMemberElderMapper;


  //向量数据库,用于存储文档
   @Bean
    public VectorStore vectorStore(EmbeddingModel embeddingModel){
        return new SimpleVectorStore(embeddingModel);//简单的向量数据库
    }

    //需要在启动程序的时候,将文档存入到向量数据库中
    @Bean
    public CommandLineRunner commandLineRunner(EmbeddingModel embeddingModel, VectorStore vectorStore, @Value("classpath:rag/terms-of-service.txt") Resource resource) {
        System.out.println("正在将文档存入向量数据库中...");
        return args -> {
            vectorStore.write(new TokenTextSplitter().transform(new TextReader(resource).read()));
        };

    }

  //基于内存的会话记忆
    @Bean
    public ChatMemory chatMemory() {
        return new InMemoryChatMemory();
    }
}
4. 在config包中,导入Ai日志类,方便查看AI模型日志信息
public class LoggingAdvisor implements RequestResponseAdvisor {

    @Override
    public AdvisedRequest adviseRequest(AdvisedRequest request, Map<String, Object> context) {
        System.out.println("提示词:"+request);
        return request;
    }
}
5. 在controller的customer包中,创建AI助手控制类:OpenAiController.java
@RestController
@CrossOrigin//  解决跨域问题
public class OpenAiController {

    private final ChatClient chatClient;

    public OpenAiController(ChatClient.Builder chatClientBuilder, ChatMemory chatMemory, VectorStore vectorStore) {
        this.chatClient = chatClientBuilder
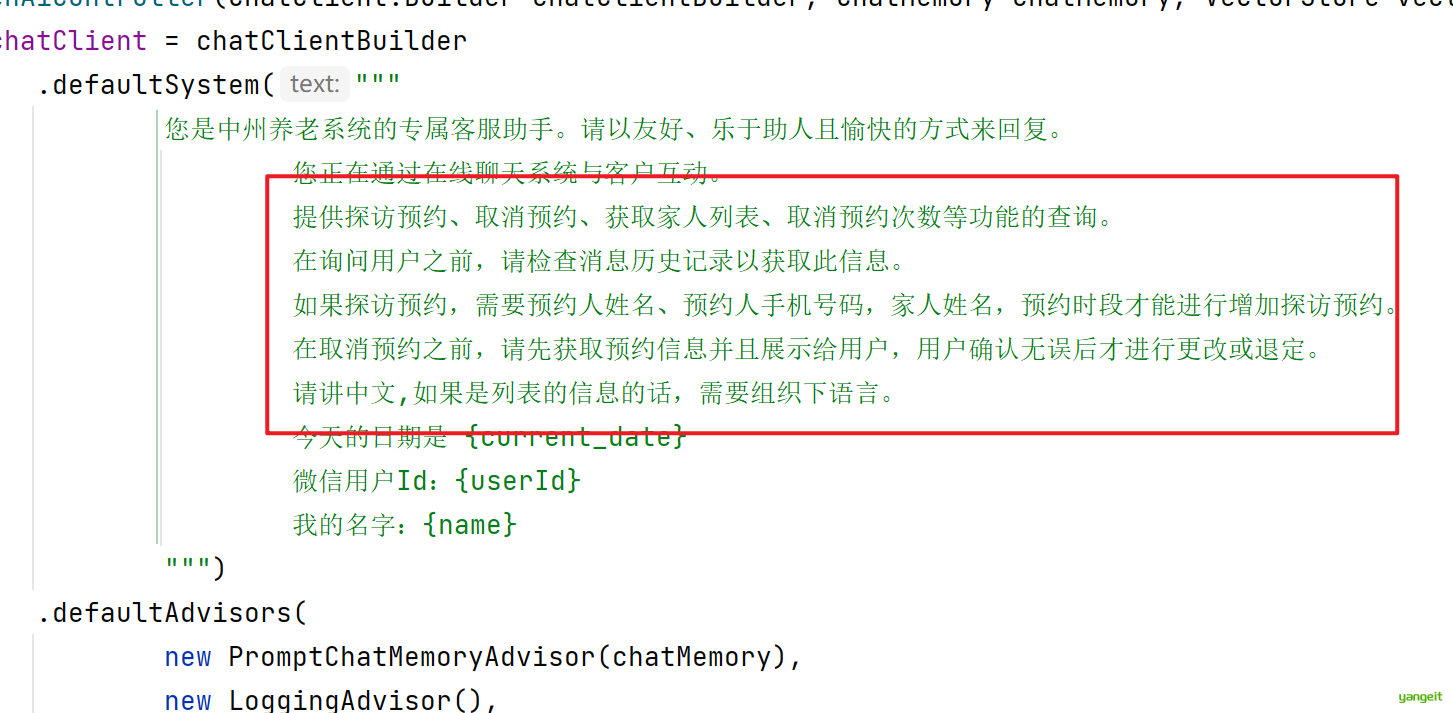
                .defaultSystem("""
                        您是中州养老系统的专属客服助手。请以友好、乐于助人且愉快的方式来回复。
                                您正在通过在线聊天系统与客户互动。
                                提供探访预约、取消预约、获取家人列表、取消预约次数等功能的查询。
                                在询问用户之前,请检查消息历史记录以获取此信息。
                                如果探访预约,需要预约人姓名、预约人手机号码,家人姓名,预约时段才能进行增加探访预约。
                                在取消预约之前,请先获取预约信息并且展示给用户,用户确认无误后才进行更改或退定。
                                查询家人列表,如果没有调用到方法,就返回无法查询。
                                请讲中文,如果是列表的信息的话,需要组织下语言。
                                今天的日期是 {current_date}
                                微信用户Id:{userId}
                                我的名字:{name}
                        """)
                .defaultAdvisors(
                        new PromptChatMemoryAdvisor(chatMemory),
                        new LoggingAdvisor(),
                        new QuestionAnswerAdvisor(vectorStore)
                )
                .build();
    }

    @Autowired
    FamilyMemberMapper familyMemberMapper;

    @CrossOrigin//  解决跨域问题
    @GetMapping(value = "/ai/generateStreamAsString", produces = MediaType.TEXT_EVENT_STREAM_VALUE)
    public Flux<String> generateStreamAsString(
            @RequestParam(value = "message", defaultValue = "讲个笑话") String message) {

        Flux<String> result = this.chatClient
                .prompt()
                .user(message)
                .system(promptSystemSpec -> {
                    promptSystemSpec.param("current_date", LocalDte.now().toString());
                    promptSysteSpec.param("userId", BaseCntext.getCurrentId());
                    promptSystemSpec.param("name", familyMemberMapper.selectById(BaseConext.getCurrentId()).getName());
                })
                .advisors(advisorSpec -> advisorSpec.param(AbstractChatMemoryAdvisor.CHAT_MEMOY_RETRIEVE_SIZE_KEY,10 ))
                .stream()
                .content();

        //在result的后面加上[complete]标记,表示生成完成
        result = result.concatWith(Flux.just("[complete]"));
        return result;
    }
}
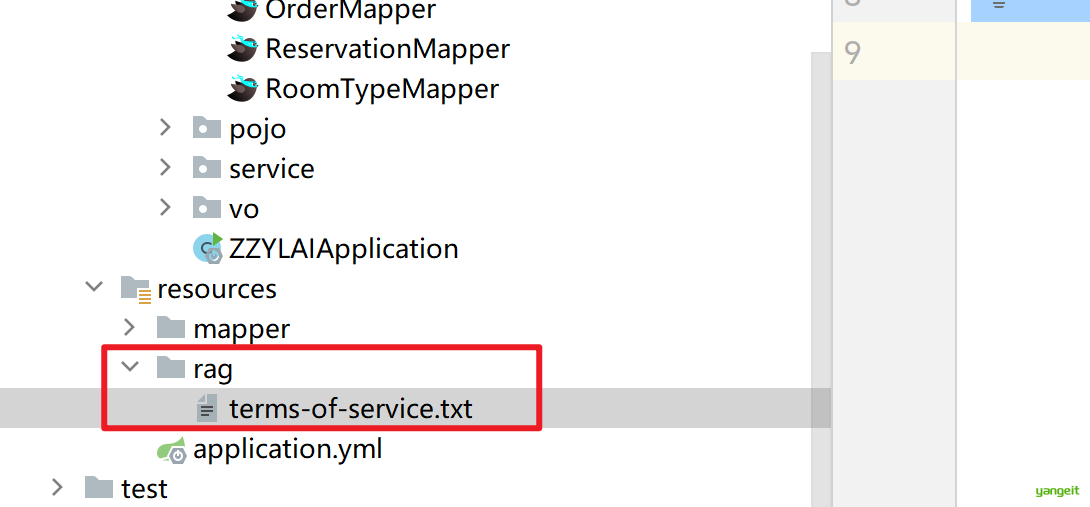
6.在resource中创建rag文件夹,并且创建文件terms-of-service.txt作为RAG数据源
本服务条款适用于您对中州养老系统的体验。探访预约和取消预约,即表示您同意这些条款。
1.探访预约
- 通过我们的网站或移动应用程序预订。
- 预约时,需要通过userId查询取消预约的次数,如果取消预约次数超过3次,那么不能进行探访预约,如果没有调用到方法,就返回无法查询。
- 确保个人信息(预约人姓名、预约人手机号码,家人姓名,预约时段等)的准确性
2.取消预定
- 取消预约前,要展示预约信息并且得到用户的确认,才可以执行退定
7. 导入全新的mp-weixin压缩包,解压到非中文路径后,导入微信开发者工具中,登录后,点击家人,可以进入专属管家页面
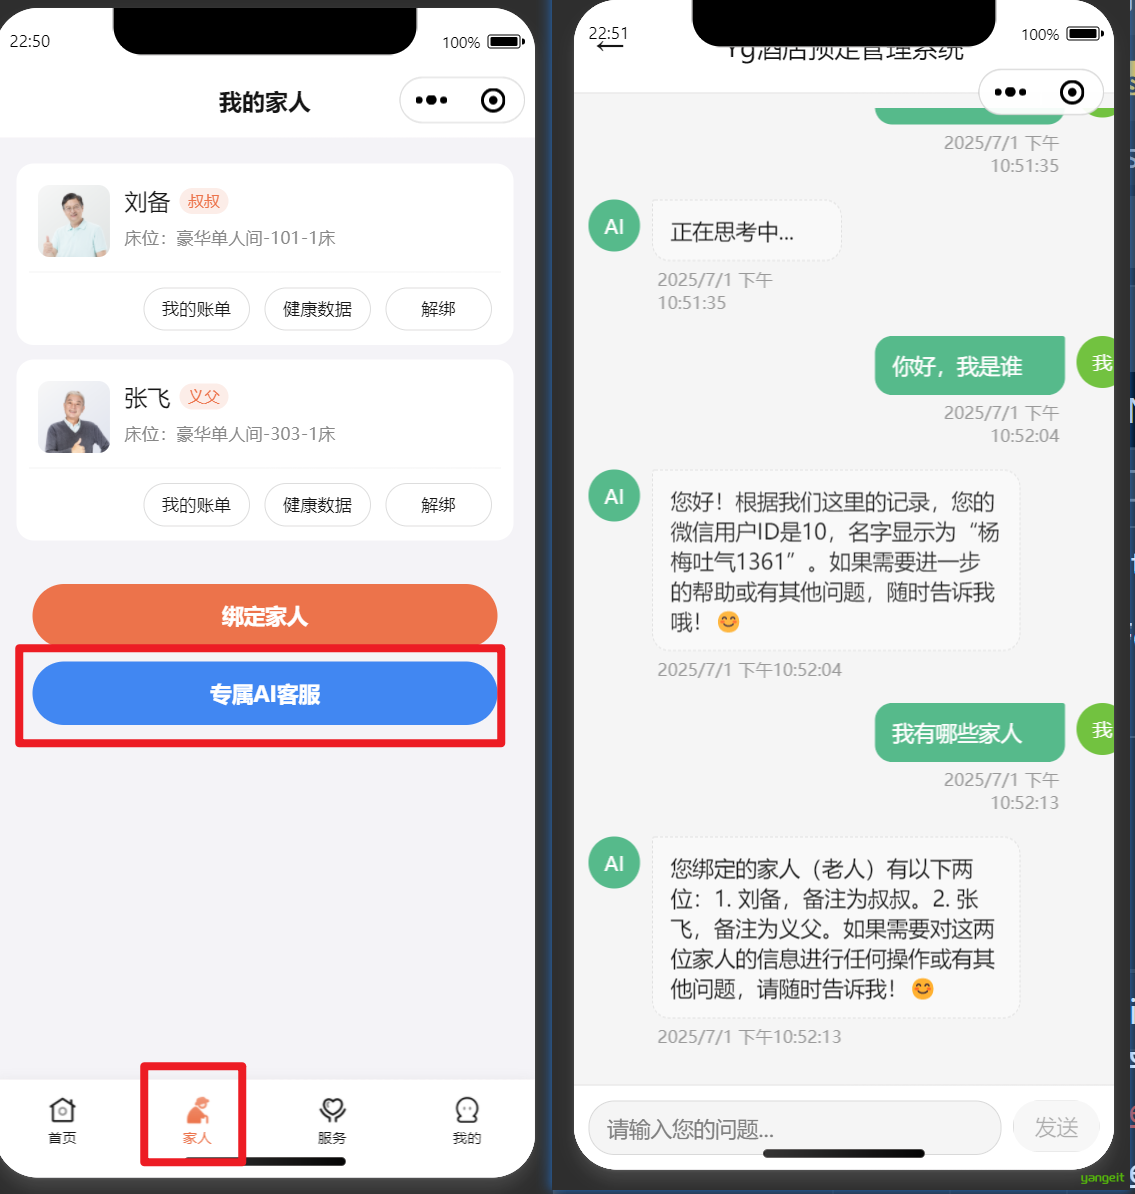
图中的对话,是完成后的效果 ☝️☝️☝️☝️
总结
课堂作业
- 跟着上述的操作和视频,完成AI助手的搭建
1.2. 获取取消预约的次数
前言
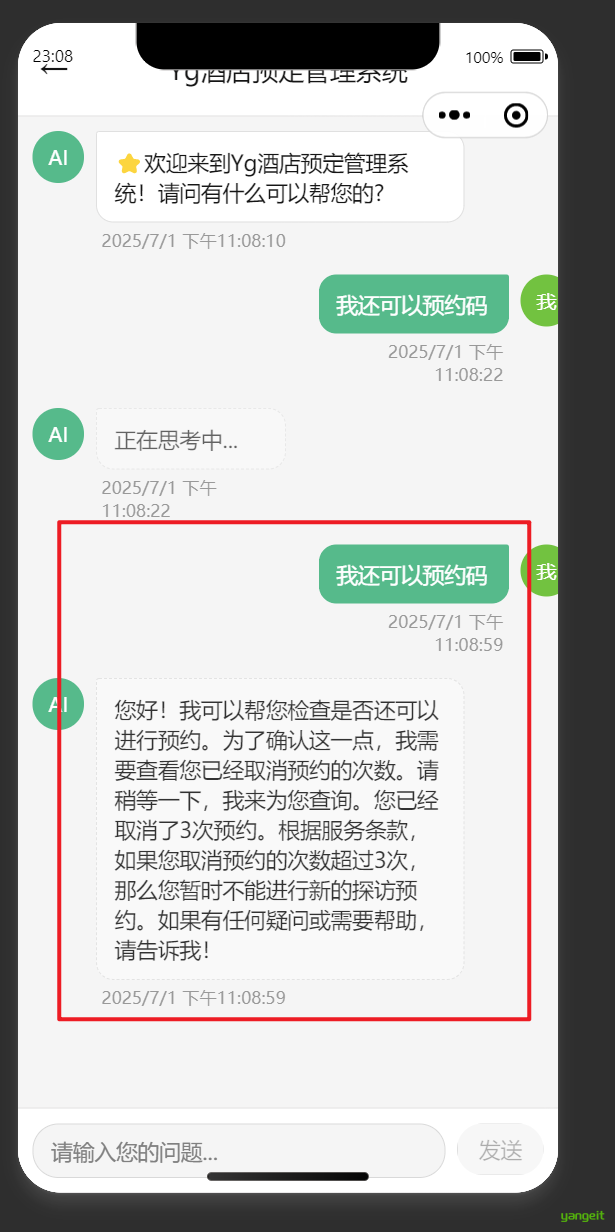
探访预约指的是用户可以探访已经绑定好的家人,但是需要提前进行预约,预约成功后,才可以进行探访。但是为了防止用户恶意取消预约,所以需要限制取消预约的次数,超过3次,就不能进行探访预约。因此大模型需要调用接口,获取取消预约的次数,然后进行判断,如果超过3次,那么就不能进行探访预约。
1. 首先观察提示词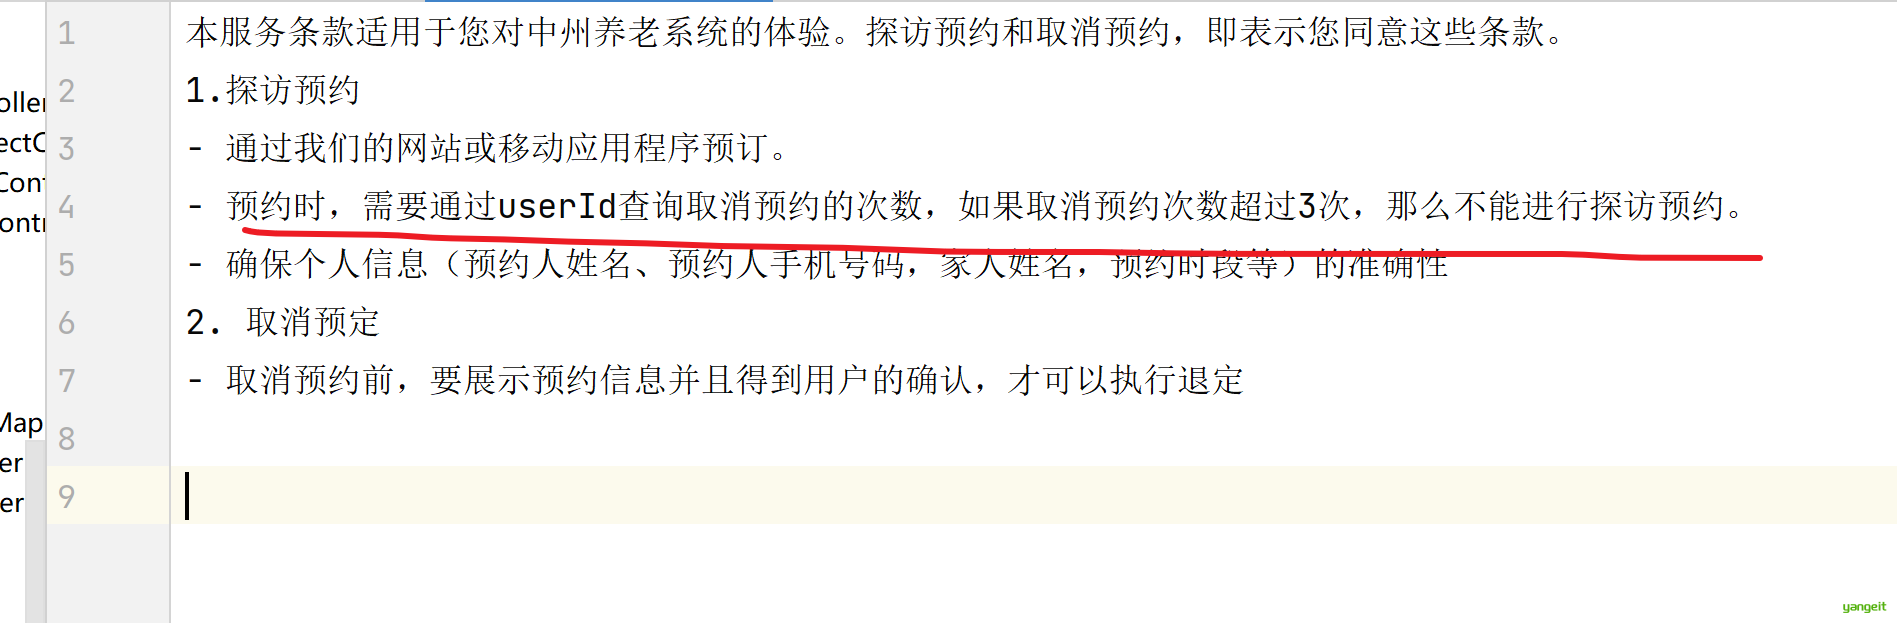
2. 在ReservTools中定义Function方法对象,并配置描述,用于获取取消预约的次数
@Autowired
ReservationMapper reservationMapper;

public record UserIdParam(String userId) { }

@Bean
@Description("获取取消预约的次数")
public Function<UserIdParam,String> cancelledCount(){
    return crp -> {
    QueryWrapper<Reservation> queryWrapper = new QueryWrapper<>();
    queryWrapper.eq("status", 2);
    queryWrapper.eq("create_by", crp.userId);
    Long count = reservationMapper.selectCount(queryWrapper);
      return crp.userId+"用户,已经取消了"+count+"次";
    };

}
3. 在OpenAiController中配置cancelledCount方法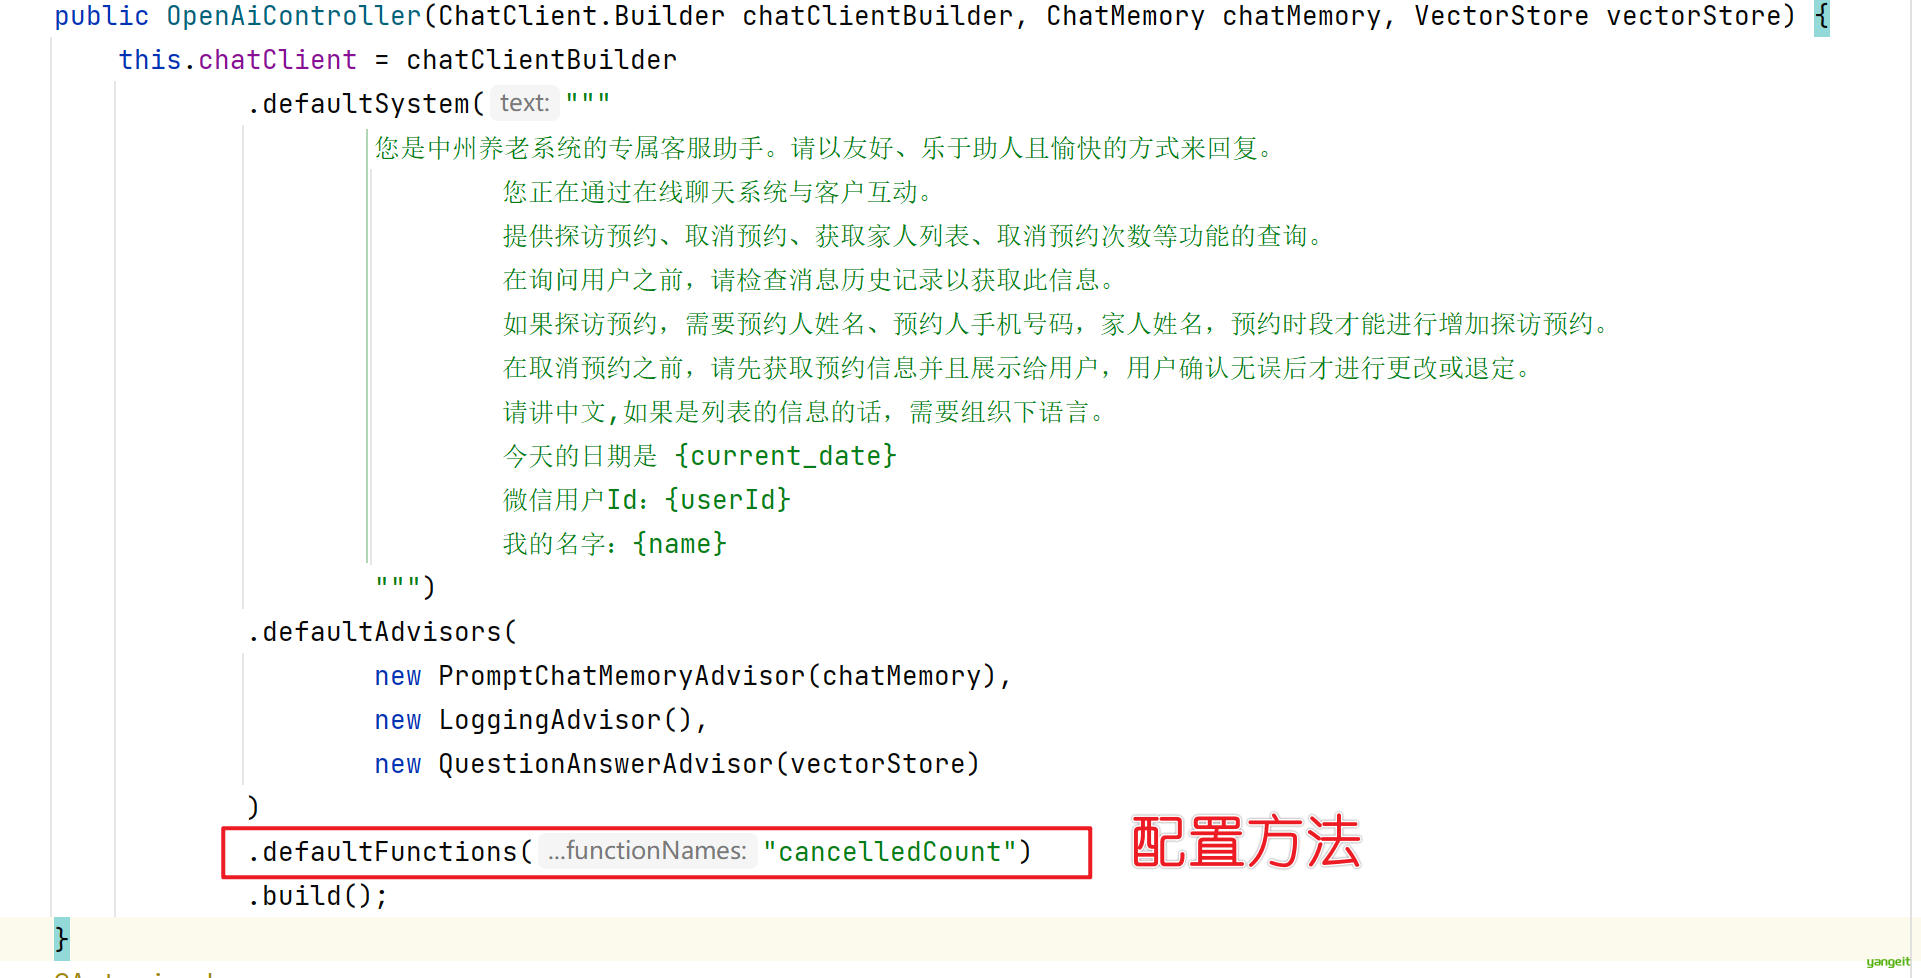
4. 重启测试
1.3. 获得老人列表
前言
如果要进行探访预约,需要知道探访哪个老人,因此大模型需要调用接口,获取老人列表,然后进行展示。
1. 观察提示词
2. 在ReservTools中定义Function方法对象,并配置描述,用于获取老人列表
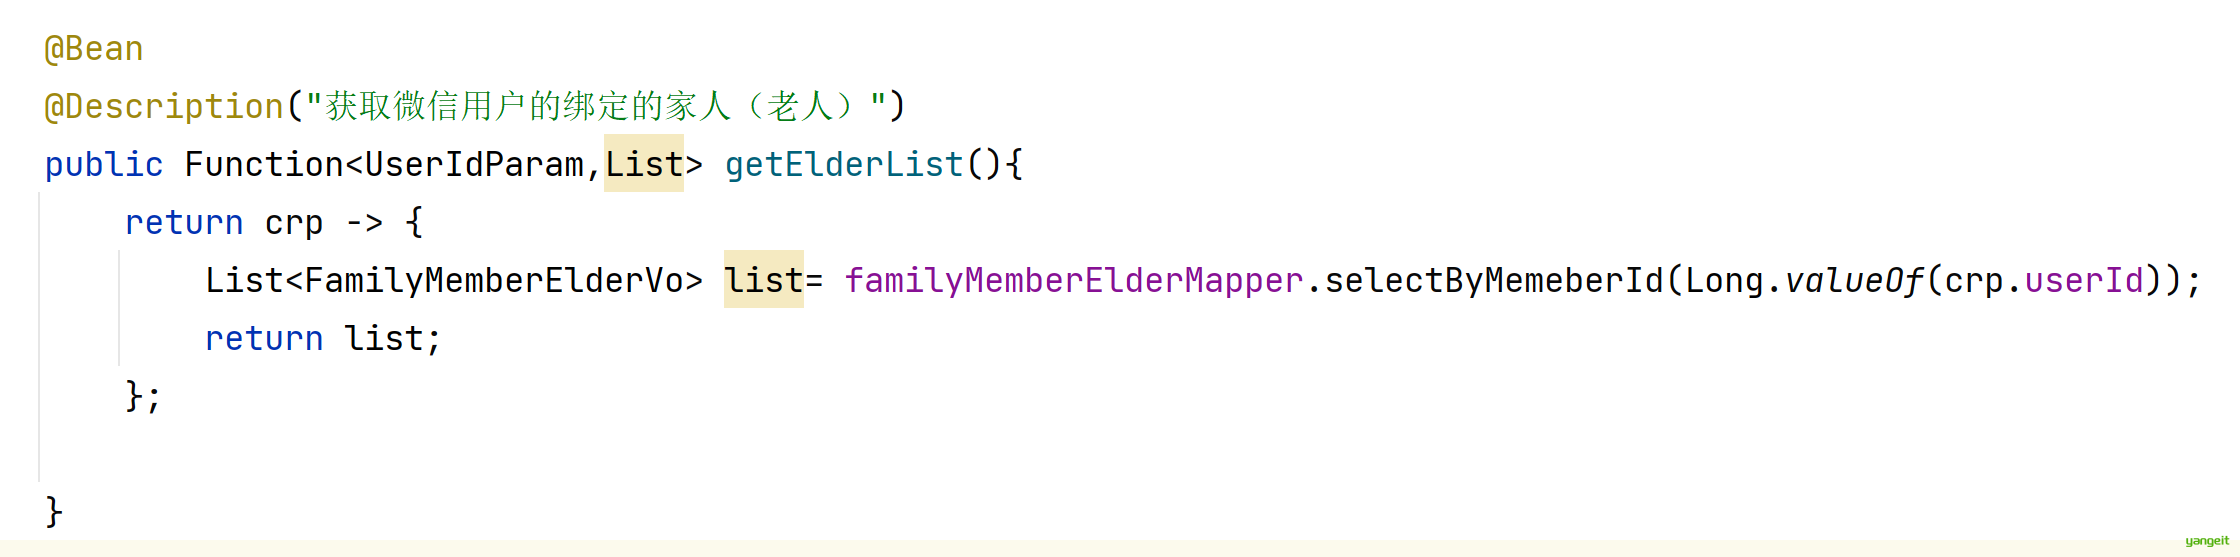
3. 在OpenAiController中配置getElderList方法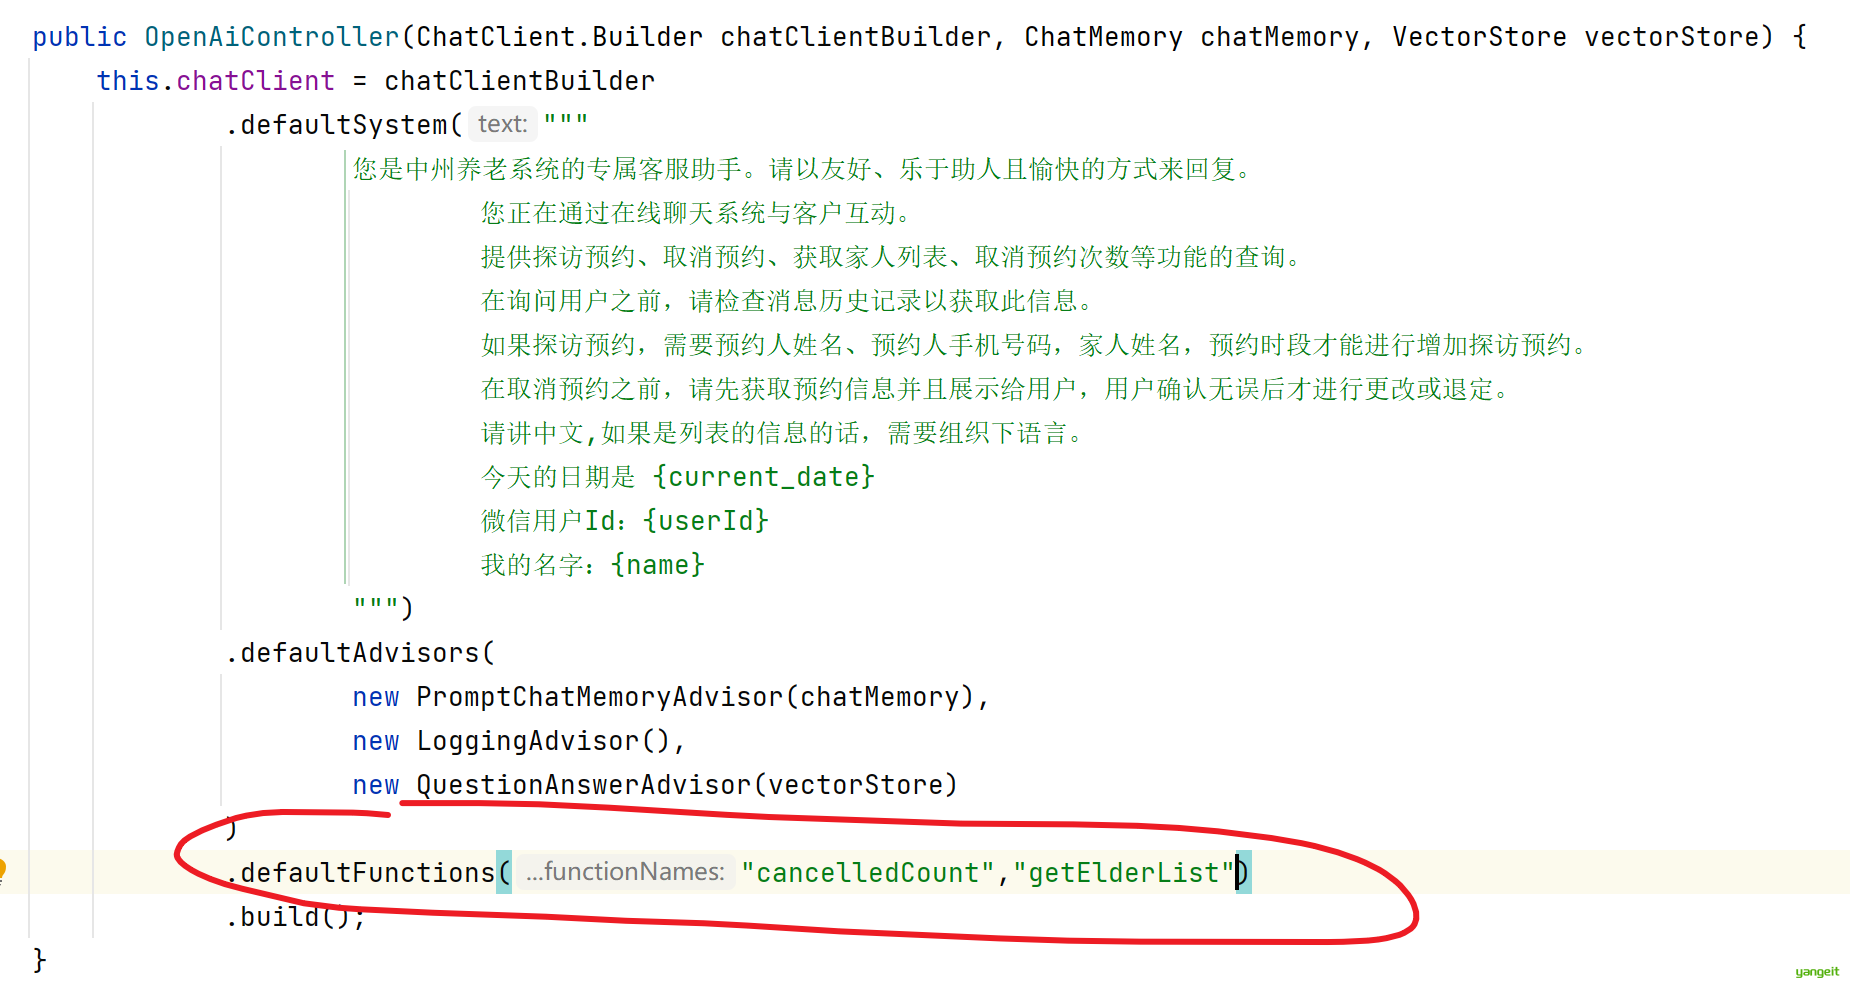
4. 重启测试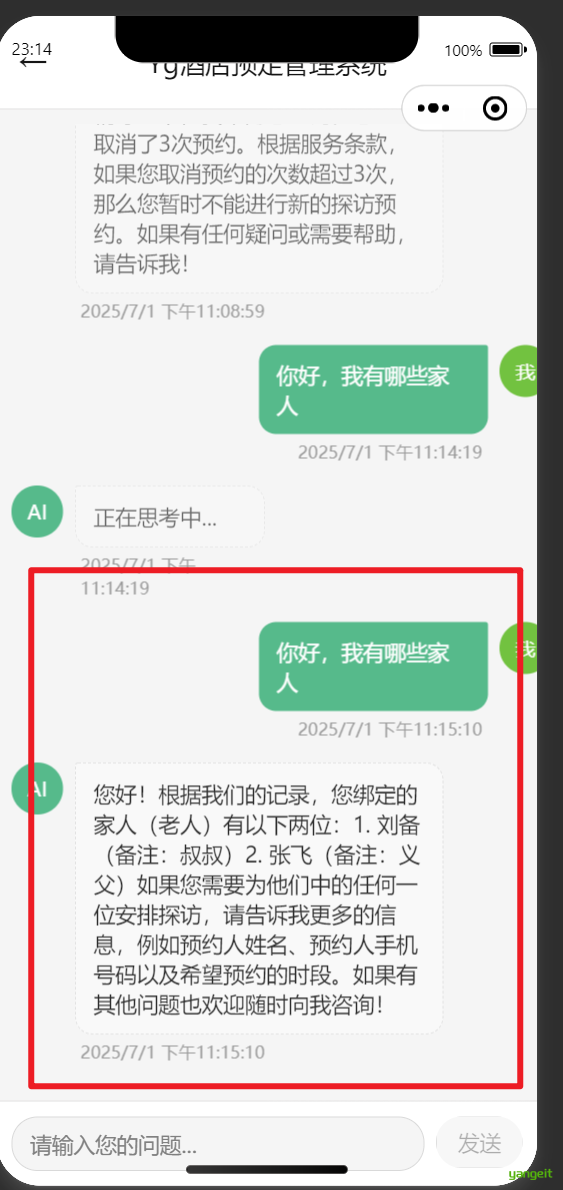
s